понеделник, 6 октомври 2014 г.

Birthdays

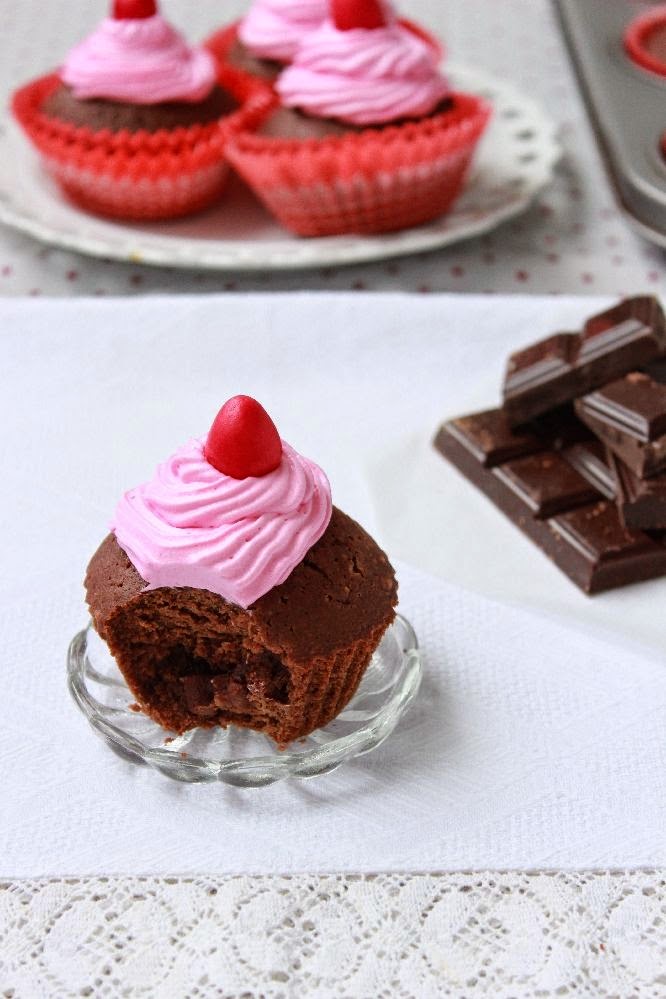
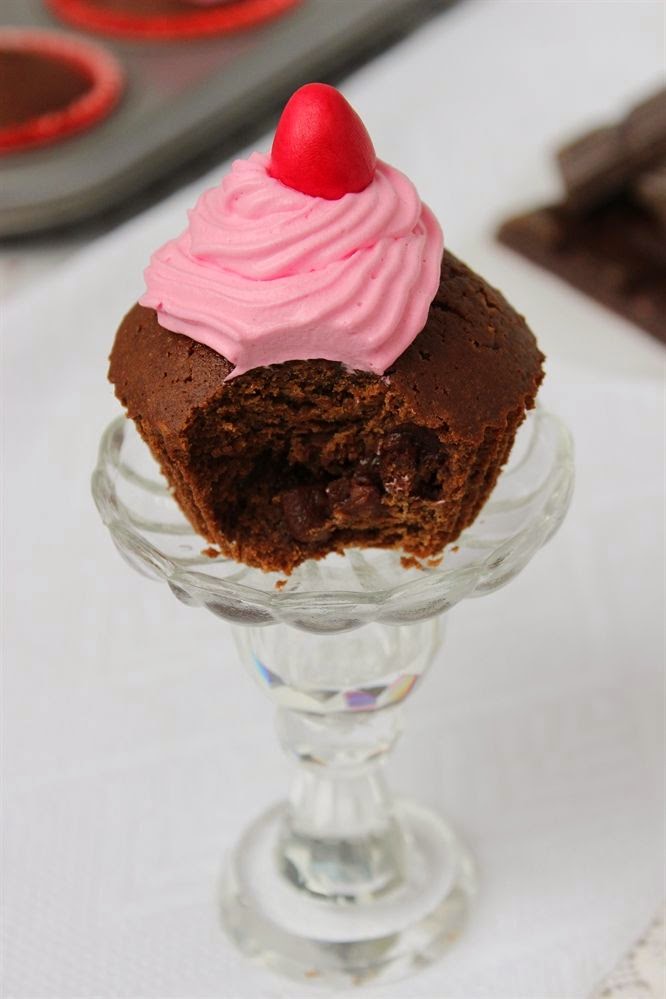
I know it's a hackneyed expression to say that time is ticking away, but it really is! On February 8 I turned 23, but my birthday is not the reason I realized how time was getting on. On February 9 my little cousin turned 9 years! I feel like she was born yesterday! I remember how we were rocking her to sleep in a blanket, because she couldn't sleep nights. I remember changing her diapers on a table, and my aunt made me look at her not to fall over the high table. We were walking in the park, taking pictures and videos of ourselves. When asking her how old she was, she barely could say "free" and was showing three fingers. She is studying English now, she is watching movie series, playing games on the internet, following hard diets (she used that expression when she realized that her trousers will not fit her for the party), making poses for photos, dancing wildly on "Gangnam Style" and Krisko Beats. Can you think of a better way to understand that time is flying, than seeing your children have grown up?


I made a two floor cake, 20 invitations (with my boyfriend's help!) and 32 fondant biscuits for the party. The kids were being amused by an animator in a cozy entertainment place. They were jumping of joy, romping and spreading a good energy all over themselves. As a senior, I was quietly taking photos with the camera, making remarks and keeping discipline. I have to admit that in the inside I was burning in desire to rush forward to their games or to start dancing side by side with them on the Penguin dance.


Madeira cake
Adapted from BBC GoodFood
for 32 pieces

Ingredients for the cake layers:
For the first floor (25 centimeters): 
526 g butter, room temperatute
526 g sugar
9 eggs
750 g flour
2 teaspoons baking powder
1 teaspoon baking soda
a pinch of salt
8 tablespoons milk
vanilla 

For the second floor (16 centimeters):
270 g butter, room temperatute
270 g sugar
4 eggs
220 g flour
1 teaspoons baking powder
1/2 teaspoon baking soda
a pinch of salt
4 tablespoons milk
vanilla


Beat the butter and sugar together in a bowl until pale and fluffy. Beat in the eggs, one at a time, beating the mixture well between each one and adding a tablespoon of the floor with the last egg to prevent mixture curdling. Mix together the floor, baking powder, baking soda and salt. Sift the floor mixture to the butter mixture and fold in, with enough milk to give a mixture that falls slowly from the spoon. Separate the mixture in two parts and put 2 tablespoons of natural cocoa in one of them. Mix well, and spoon the mixture into two prepared buttered tins, covered with baking paper, and lightly level the top. Bake on the middle shelf of the oven for 60 - 70 minutes to 180C, or until a skewer inserted into a center comes out clean. Remove from the oven and set aside to cool in the tin for 10 minutes, then turn it out on to a wire rack and leave to cool completely. Prepare the cake layers for the second floor in the same way, just decrease baking time.

Ingredients for the inside cream:
250 g instant Bavarian cream
500 ml cold water

In a bowl mix together the instant cream with water for 5 minutes until thick and fluffy.

Ingredients for the butter cream:
250 g butter, room temperature
150 g sugar
2-3 tablespoons milk

In a bowl mix together butter with sugar until pale and fluffy. Add the milk and be sure that the sugar is dissolved.

Covering and decoration:
2 kilos white fondant
natural farina 
food coloring
sugar pearls
toothpicks
skewers


Putting the pieces of the cake together:
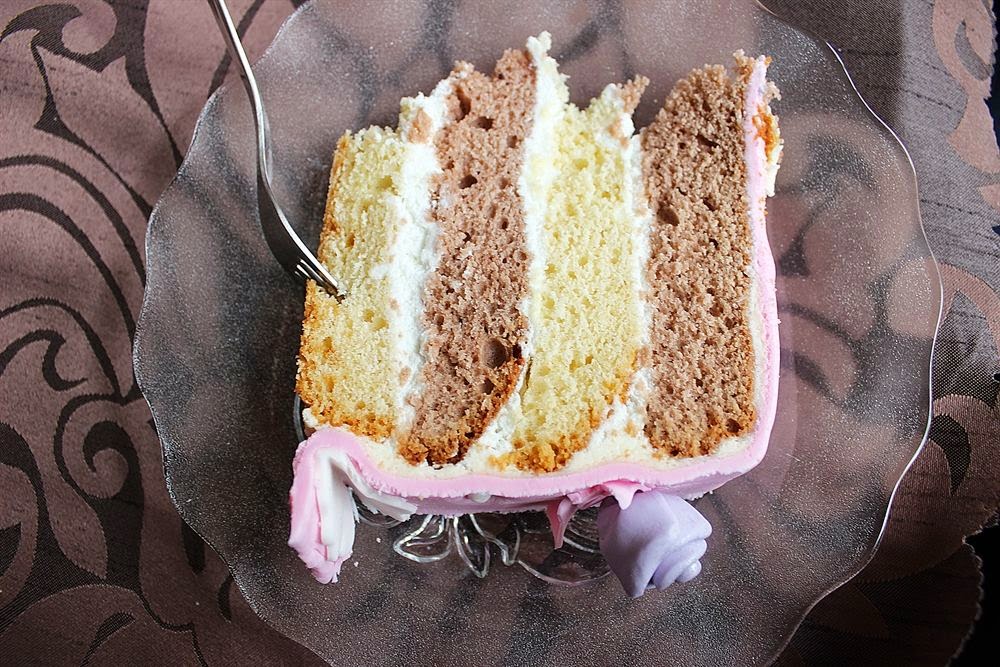
Cut the cake layers on two. You should have two chocolate and two vanilla cake layers. Place a vanilla cake layer on cake plate, coated with a little bit of the cream.Cream the cake layer, put a chocolate layer on it and press. Do the same with the other cake layers. Put the two separate floors in the fridge for a while. Cream the cakes with the butter cream. Cover them completely, so that you cannot see the cake layers. Put the cakes in the fridge again.
Color the fondant, adding small amount of the food coloring, until you receive the desired nuance. Roll the fondant on a big circle, using natural farina. Using the rolling-pin, transfer it onto the cake and smooth with a cake polisher. Do the same with the second floor. Fix four skewers in the middle of the first floor. Put the second floor over the first. Decorate with sugar pearls, make some small balls, roses, let your imagination roam! To glue the elements, use sugar syrup.


Lemon cardamom biscuits

Ingredients:
for 32 biscuits:
174 g butter, room temperature
280 g sugar
2 eggs
vanilla
grated rind of 1 lemon
a pinch of salt
1/2 teaspoon cardamom
300 g flour + more for kneading

for decoration:
different colored fondant
sugar syrup
sugar pearls
dough cutters
cellophane envelopes
bows


With an electric mixer, cream butter until soft. Add the sugar gradually and continue beating until light and fluffy. Using a wooden spoon, slowly mix in the eggs, one at a time. Add the vanilla, lemon rind, salt and cardamom. Add the flour and stir until blended. Gather the mixture into a ball, wrap in baking parchment and chill for at least 2 hours. On a floured surface, roll out the dough to 5 mm thick. Stamp out shapes with biscuit cutters. I chose asymmetrical squares and rectangles to give them more child's look. Bake until lightly colored, about 8 minutes to 180C. Transfer to a rack carefully and leave to cool completely before decorating with fondant. Use sugar syrup for glue.
My decorating idea was to use same shapes and colors as the decoration of the cake. Wrap the biscuits in cellophane envelopes and bind them with colored bows.

Stuffed tomato with a poached egg

Stuffed tomato with a poached egg


Ingredients:
for 2 portions:

2 tomatoes
2 eggs
100 g Bulgarian cheese
oregano
olive oil

Poach the eggs one by one. Spring them with some salt and peel the tomatoes by putting them into boiling water for 15 seconds. Cut the seeds and all the inner part of the tomatoes, stuff with the poached eggs, Bulgarian cheese and season with oregano and olive oil.

неделя, 5 октомври 2014 г.

Pancake cake

Тhe best thing about Pancake cakes is that you may use any leftovers you have in the fridge and as a result, you receive a stunning cake!


Pancake cake

Ingredients:
for the pancakes:
4 eggs
500 ml milk
1 teaspoon salt
250 g all-purpose flour
20 g melted butter

for the filling:
4-5 pickles
4 hard boiled eggs
2 boiled carrots
a piece of yellow cheese
200 g mayonnaise
a piece of ham
100 g corn
100 g processed cheese


In a big bowl, mix the ingredients for the pancakes. Bake about 15 to 20 pancakes in a pan. Cut the ingredients for the filling. Start constructing the cake by placing a pancake, spreading mayonnaise and putting veggies, cheese and ham. Do this action, until you have a cake. Spread some mayonnaise all over it and decorate on your taste.

Parmesan Rosemary Crackers

Crackers, salty biscuits, cheese cookies... Who doesn't love them? I prefer them fresh baked and made with fresh ingredients. These crackers took first place in my rating for salty biscuits! I replaced all purpose white flour with black wheat flour so that we can eat them without being conscience stricken. However, you can prepare them with white flour.


Parmesan Rosemary Crackers

Adapted from Martha Stewart

Ingredients:
for 15 crackers:
3/4 cup black wheat flour
1/2 tablespoon sea salt
a big pinch of white pepper
the leaves of a small bunch of rosemary
3 tablespoons butter
1 cup freshly grated Parmigiano Reggiano cheese
5 tablespoons sour cream
1 eggwhite


Combine flour, salt, white pepper and rosemary in the bowl of a food processor and pulse to combine. Add butter, pulse until mixture resembles coarse meal. Add cheese and pulse until combined. Add 1 tablespoon of the sour cream at a time, pulsing each time to combine. Process until dough comes together and is well combined. 
Transfer dough to a work surface. Shape dough into a 5-centimeters-wide log. Wrap with plastic wrap and refrigerate for 2 to3 hours in the freezer, or for 24 hours in the refrigerator.
Heat oven to 180 degrees Celsius. Slice chilled log into 7-8-centimeters-thick slices. Transfer slices to a parchment-lined baking sheet. Dip a sprig of rosemary into egg white and place in center of a cracker slice. Bake for about 25 minutes, or until crackers are golden brown and firm in the center. Transfer to a rack to cool.

събота, 4 октомври 2014 г.

Chocolate and Blueberry Truffle Spoons

These spoons are a wonderful idea for a Valentine's Day present! They are so delicious and easy to make!


Chocolate and Blueberry Truffle Spoons
Adapted from A Spicy Perspective

Ingredients:
for 10 spoons:
For the blueberry ganache:
100 ml heavy cream
100 g chopped white chocolate
1/4 teaspoon blueberry essence
violet food coloring
a pinch of salt

You will also need:
150 g chopped dark chocolate
1 tablespoon sunflower oil
violet sprinkles
10 plastic spoons
some ribbons
cellophane packs


Scald the cream. Place the chopped white chocolate in a bowl and pour the hot cream over the white chocolate. Stir until smooth. Add the food coloring, the essence and salt. Mix well then place in the fridge to cool. Once cool, put the ganache into a bowl and whip with an electric mixer until light and fluffy. Place the whipped ganache in a piping bag with a large tip. Pipe the ganache smoothly onto the spoons and freeze.


Once the ganache filled spoons are frozen, place the 1/3 of the dark chocolate and the oil in a double boiler over medium low heat. Stir as it melts. Once completely melted, remove from heat and add the remaining chocolate. Stir until smooth. Dip the spoons into the dark chocolate. Wave the spoon a little to remove extra chocolate, then lay on a baking paper to cool. Gently place the sprinkles before the chocolate dries.

Brownie cupcakes with raspberry beer

Chocolate, taken alone, is not to my taste. I love it, when it's combined with other flavours - orange, mint, nuts, alcohol, banana, raspberries... There aren't fresh raspberries in these cupcakes. I used some raspberry beer that made them so yummy! I avoid using artificial aromas, but it is winter in my country and I could not find any fresh raspberries, so I used some raspberry essence for the frosting. In fact, that's not a problem for me, cause I use these things very rarely :)


Brownie cupcakes with raspberry beer
Author's recipe

Ingredients:
for 12 cupcakes
140 g flour
15 g cocoa powder
a pinch of salt
55 g unsalted butter, room temperature
60 g dark chocolate
60 g milk chocolate
60 g white chocolate
2 eggs, room temperature
70 g sugar
100 ml raspberry beer, no foam
100 g milk chocolate chips (or chopped chocolate)

For the frosting:
100 ml whipping cream
powdered sugar on taste
1/2 tablespoon raspberry essence
pink food paint (optional)


In a medium bowl stir flour, cocoa powder and salt until evenly combined. In a double boiler melt butter, dark, milk and white chocolate, stirring frequently until completely melted and smooth. In a large mixing bowl, beat eggs and sugar on high speed (about 3-4 minutes). Add a few spoonfuls of the egg mixture into the chocolate mixture to temper it. Stir until combined. Then pour all the chocolate mixture into the egg mixture and beat well. Add the flour mixture slowly into the egg mixture and stir until just combined. Fold in the beer, followed by the milk chocolate chips and mix until combined. Spoon cupcake batter into paper liners until 1/4 to full. Bake for 15 to 17 minutes or until the moment before a toothpick inserted in center comes out clean. For the frosting, beat the cold whipping cream with powdered sugar, color and add the flavor. Pipe the frosting over the cupcakes and decorate with fresh raspberries or candy.

Mint chocolate cheesecake

I came to Provincetown, Massachuzzets a month ago. I started working in a restaurant, after a while, started working in another one too. During the first week I was washing dishes and cleaning the floor. I went hardly through this, because I didn’t expect it. At that moment, the story about Rockefeller came to my mind – that he has one dollar in his pocket, when he started his career.


These are the thoughts that made me feel better and everything came to its place later – they removed me in the Prep Kitchen – where we cut products, measure them into portions, clean mussels, oysters and etc. They also told me I will be working in Pizza Kitchen. There we make pizzas, panini, serve desserts (not made in the restaurant), some appetizers and some other things. In the other restaurant I work on the salte, on the grill sometimes on the fry. I am making pizzas and salads from time to time. I don’t know how to put into words all this, I just can say I am having a great time! The days I like most are when the restaurants are busy. There are so many tickets, that you don’t know exactly what you are doing. I like the chaos in the kitchen and that I am allowed to get things under control. This is Chef’s obligation, but as a part of the team, I feel that I also contribute to it.


I am working with products that I have never seen in Bulgaria. The thing I like most is that I have learnt so many things about these unfamiliar products, how they have to be cooked, their smell, what they have to be eaten with and all that thanks to books, TV shows, Jamie Oliver and so on. Every day I am learning new things, I am writing down every recipe I get, technique or just something that made me impression. I recognize people who know food and I am always trying to be around them, whether sometimes I become very annoying. Some colleagues think that I want to make good impression to everybody, that I am so importunate, but they just don’t realize the reason why I got here. It is to gain some experience, to learn as much as I can, and I even want to get acquainted with the dark side of culinary, how Chef Joe calls it.


Talking about dark side, I couldn’t not mention that I gathered a great speed when cutting onions, carrots, salads, spices. That went well, instead of the wounds I got during the last weeks. People tell me I am the most unfortunate girl they have ever seen. My hands are in scars from burning, my legs are bruised, because I am falling over all the time, I have only two uncut fingers on my right hand. It will be a heroic act if I survive till the end of the summer.


I am always thinking about which is harder – preparing recipes at home and writing in my blog or working in a restaurant. Except not knowing which is more difficult, I even do not know which is more pleasant, because when working team is nice, time is ticking away and in the end of the day you congratulate each other for the good job. Anyways, I think that managing a blog is more difficult, because it costs precision, photographic skills, imagination. Recipes in the restaurant are all the same every day and we are not allowed to change anything, which is easier to ordinary people, because not all of them are creatively disposed. However, I have imagination enough and to spare, so blog wins.


Mint chocolate cheesecake
Author's recipe

Ingredients:
for a 18sm pan

220 g Oreo cookies with mint
60 g butter
340 g cream cheese
340 g sour cream
100 g marshmallow fluff
powdered sugar on taste
mini chocolate chips
green food colour
mint essence
some mint leaves
cocktail cherries


For the base:
Wrap the bottom and the walls of a pan with foil. Place cookies and butter in a blender and pulse until they come into crumbs. Place them on the bottom of the pan, press well so that you get a thick and even crust. Place the pan for a couple of minutes in the freezer.


For the filling:
Mix cream cheese with powdered sugar, green food color and essence for a minute. Add marshmallow fluff, mix again. Add sour cream and chocolate chips. Stir well.


Finally:
Place the filling onto the chilled base. Place it evenly using a spatula and put the dessert in the fridge for one night. When serving, remove the cake from the pan, remove wrap and place the cheesecake in a dessert plate. Decorate it with a couple of Oreo cookies, cocktail cherries and mint leaves.


Happy 4th of July!